Apple's Camera app records ProRes in Video mode, but the format is unavailable in its dedicated Slo-mo mode. You can still make slow motion from that footage by changing its playback speed during editing.
On iPhone 16 Pro and 17 Pro models, recording 4K ProRes at 120 fps requires external storage. Enable Apple ProRes under Camera, then Formats in Settings, and select Video mode when you return to Camera. Keep ProRes enabled while choosing your resolution and frame rate.
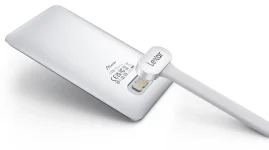
Recording to the Lexar Muse with SnapLink or another compatible drive gives you footage to retime later. A five-second take at 120 fps contains enough frames for 20 seconds of quarter-speed playback in a 30 fps project.
Automatic project settings can follow the first video clip you add. A 60 fps clip can establish a 60 fps project when you meant to finish at 30 fps. Your recording hasn't changed, but the available slowdown has.
Final Cut won't let you change a project's frame rate while its timeline contains clips. Catch the mismatch early, and you can start a fresh project at the correct rate, rather than move an already edited sequence.
The browser's high-frame-rate badge isn't proof that a clip has been slowed down in your edit. It identifies footage recorded at 95 fps or above. Look at the timeline's speed setting before assuming the clip is ready.
Preview controls can also confuse the issue. Pressing Option-L plays footage at half speed for inspection, without applying a retiming effect. A slow preview alone doesn't establish what an exported sequence will do.
In a 24 fps project, the same five-second recording lasts 25 seconds at 20 percent speed. In a 60 fps project, it lasts ten seconds at half speed. These examples assume footage recorded at exactly 120 fps.
For a slowdown that preserves every captured frame, divide the project frame rate by the recording frame rate, then multiply by 100. Use the actual rates shown in your clip information and project settings, rather than relying on a rounded recording label.
Simply adding a high-frame-rate clip to a slower project doesn't perform this calculation for you. Final Cut can sample the footage to match the timeline while retaining its original duration. A five-second action still takes five seconds until you apply a speed change.
Use the original 120 fps file for these calculations. An exported slow-motion copy may already run at 30 fps, with the slowdown built into its duration. Applying another quarter-speed change to that copy slows an already slowed shot, rather than recovering additional moments from the recording.
Quarter speed isn't a universal setting for 120 fps footage. In a 60 fps project, it spreads 120 captured frames across four seconds containing 240 output frames. Half of those output positions need repeated or generated images.
Optical flow can generate intermediate frames when you need them. For the exact 120-to-30 conversion at quarter speed, however, you already have a captured frame for every output position. Extra frame generation isn't needed to fill gaps.
Suppose your five-second recording follows a drummer raising a stick, striking a cymbal, and letting it ring. At quarter speed, the full visual sequence needs 20 seconds. Keeping the timeline slot at five seconds shows only the first 1.25 seconds of the original action.
You might lose the strike entirely, despite having recorded it perfectly. The missing moment hasn't vanished from the source file; your edited selection ends before playback reaches it. A gap immediately after the clip can let Final Cut extend the slowed shot into that space.
With no spare room, you have to trade some slowdown for duration or select a shorter piece of the original action. A five-second slot at quarter speed accommodates 1.25 seconds of source footage, so the selection must include the cymbal strike rather than the entire windup.
On iPhone 16 Pro and 17 Pro models, recording 4K ProRes at 120 fps requires external storage. Enable Apple ProRes under Camera, then Formats in Settings, and select Video mode when you return to Camera. Keep ProRes enabled while choosing your resolution and frame rate.
Recording to the Lexar Muse with SnapLink or another compatible drive gives you footage to retime later. A five-second take at 120 fps contains enough frames for 20 seconds of quarter-speed playback in a 30 fps project.
The first clip can set the wrong project frame rate
On your Mac, create the Final Cut Pro project before adding high-frame-rate footage. Choose File, New, then Project, open Use Custom Settings if needed, and select the frame rate you intend to deliver. For this example, use 30 fps.Automatic project settings can follow the first video clip you add. A 60 fps clip can establish a 60 fps project when you meant to finish at 30 fps. Your recording hasn't changed, but the available slowdown has.
Final Cut won't let you change a project's frame rate while its timeline contains clips. Catch the mismatch early, and you can start a fresh project at the correct rate, rather than move an already edited sequence.
The browser's high-frame-rate badge isn't proof that a clip has been slowed down in your edit. It identifies footage recorded at 95 fps or above. Look at the timeline's speed setting before assuming the clip is ready.
Preview controls can also confuse the issue. Pressing Option-L plays footage at half speed for inspection, without applying a retiming effect. A slow preview alone doesn't establish what an exported sequence will do.
Automatic Speed keeps the frames you actually shot
Select your 120 fps clip in the 30 fps timeline, open the Retime menu beneath the viewer, and choose Automatic Speed. Final Cut plays every original frame once at the project's frame rate. No skipped frames or manufactured replacements.In a 24 fps project, the same five-second recording lasts 25 seconds at 20 percent speed. In a 60 fps project, it lasts ten seconds at half speed. These examples assume footage recorded at exactly 120 fps.
For a slowdown that preserves every captured frame, divide the project frame rate by the recording frame rate, then multiply by 100. Use the actual rates shown in your clip information and project settings, rather than relying on a rounded recording label.
Simply adding a high-frame-rate clip to a slower project doesn't perform this calculation for you. Final Cut can sample the footage to match the timeline while retaining its original duration. A five-second action still takes five seconds until you apply a speed change.
Use the original 120 fps file for these calculations. An exported slow-motion copy may already run at 30 fps, with the slowdown built into its duration. Applying another quarter-speed change to that copy slows an already slowed shot, rather than recovering additional moments from the recording.
Quarter speed isn't a universal setting for 120 fps footage. In a 60 fps project, it spreads 120 captured frames across four seconds containing 240 output frames. Half of those output positions need repeated or generated images.
Optical flow can generate intermediate frames when you need them. For the exact 120-to-30 conversion at quarter speed, however, you already have a captured frame for every output position. Extra frame generation isn't needed to fill gaps.
A fixed clip length can hide the end of your shot
Final Cut's Custom speed controls include a Ripple option. Turning it off lets you change speed without pushing the following clips along the timeline, but the slower shot may show less of the action. Useful for keeping an edit in place, awkward for a shot with an important ending.Suppose your five-second recording follows a drummer raising a stick, striking a cymbal, and letting it ring. At quarter speed, the full visual sequence needs 20 seconds. Keeping the timeline slot at five seconds shows only the first 1.25 seconds of the original action.
You might lose the strike entirely, despite having recorded it perfectly. The missing moment hasn't vanished from the source file; your edited selection ends before playback reaches it. A gap immediately after the clip can let Final Cut extend the slowed shot into that space.
With no spare room, you have to trade some slowdown for duration or select a shorter piece of the original action. A five-second slot at quarter speed accommodates 1.25 seconds of source footage, so the selection must include the cymbal strike rather than the entire windup.