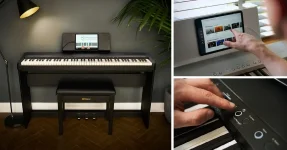
The Roland FP-40’s built-in recorder stores one song as a Standard MIDI File, with a recording capacity of approximately 500 KB. It’s useful for listening back to your playing, but it doesn’t produce the same thing as an audio recording.
Before recording a whole piece, decide what you want to do with it afterward. Sending a teacher something to hear, editing a wrong note, and filming your hands call for different choices. Pick the result first.
Your FP-40 with Piano Sphere learning support can track practice activity, but a playing-time record cannot let someone hear your phrasing. For feedback on the performance itself, you need a recording they can play.
For a quick practice check at the piano, the onboard recorder gives you a straightforward place to start. Record a short passage, then listen for uneven timing or a melody that disappears beneath the accompaniment.
The recorder’s one-song, one-part specification matters if you want to keep several attempts. Don’t plan a week of practice comparisons around a single internal slot. Keep dated recordings outside the piano when you need an archive.
Nor does 500 KB translate into a fixed number of recording minutes. MIDI contains events, so the amount of performance data matters as well as elapsed time. A sparse passage and busy playing need not consume storage at the same rate.
If you want to move notes around afterward, record MIDI into suitable music software through the FP-40’s USB-C connection. In a MIDI editor, you can adjust note placement and velocity without replaying the entire passage.
Keep the original take before making corrections. A tidied version may suit a song you’re producing, while the unedited version is more useful for assessing your practice. Sending a teacher corrected timing would hide the very thing you wanted help with.
For a teacher who simply needs to listen, an audio take of your piano performance avoids depending on their MIDI instrument. They hear the captured sound instead of a fresh rendering through whatever piano patch their software happens to load. Your choice of sound remains part of the recording.
MIDI still has value alongside it. If you send both, label the audio as the listening reference and the MIDI as the editable performance data, so their purposes stay clear.
A USB flash drive introduces a separate distinction. Roland lists WAV and MP3 under audio playback, while the onboard recorder is specified as Standard MIDI File recording. Supported playback formats do not establish that the piano records directly into those formats.
If you need a WAV file, capture audio in recording software and export that recording as WAV. Don’t rename a MIDI file’s extension and expect the sound to appear. Rendering MIDI to audio requires an instrument to produce it.
Before recording the full piece, capture a few loud chords and a quiet passage. Listen to the saved test, checking for distortion, missing sound, or a level so low that the softer notes are hard to judge.
Use the recording software’s input meter to check the loudest passage before committing to a take. Leave room below clipping, and repeat the short test after adjusting levels. Hearing comfortable volume from the piano alone doesn’t tell you what the recording software has captured.
For a lesson submission, frame the keyboard and your hands before worrying about the room behind you. If the teacher needs to assess pedal movement, include that in the view or make a separate clearly labeled clip. An attractive shot of your face won’t show the fingering they need to examine.
Test speech and piano together before the full performance. Say the piece’s name, play its loudest section, and listen to the saved clip to check whether both remain clear.
After the final chord, leave the recording running until the sound has faded. When trimming, keep that decay intact and retain any opening count-in the teacher needs to judge your entrance. Cutting tightly against the first and last notes can remove part of the performance you meant to share.
Before recording a whole piece, decide what you want to do with it afterward. Sending a teacher something to hear, editing a wrong note, and filming your hands call for different choices. Pick the result first.
Your FP-40 with Piano Sphere learning support can track practice activity, but a playing-time record cannot let someone hear your phrasing. For feedback on the performance itself, you need a recording they can play.
MIDI keeps the notes available for editing
MIDI records performance instructions rather than a finished sound waveform. A compatible instrument turns those instructions into sound during playback. The sound you hear therefore depends on what plays the file.For a quick practice check at the piano, the onboard recorder gives you a straightforward place to start. Record a short passage, then listen for uneven timing or a melody that disappears beneath the accompaniment.
The recorder’s one-song, one-part specification matters if you want to keep several attempts. Don’t plan a week of practice comparisons around a single internal slot. Keep dated recordings outside the piano when you need an archive.
Nor does 500 KB translate into a fixed number of recording minutes. MIDI contains events, so the amount of performance data matters as well as elapsed time. A sparse passage and busy playing need not consume storage at the same rate.
If you want to move notes around afterward, record MIDI into suitable music software through the FP-40’s USB-C connection. In a MIDI editor, you can adjust note placement and velocity without replaying the entire passage.
Keep the original take before making corrections. A tidied version may suit a song you’re producing, while the unedited version is more useful for assessing your practice. Sending a teacher corrected timing would hide the very thing you wanted help with.
USB audio preserves the piano sound you chose
The FP-40’s USB-C Mobile/PC port carries both MIDI and audio. In recording software, choose an audio track receiving the piano when you want to capture its sound.For a teacher who simply needs to listen, an audio take of your piano performance avoids depending on their MIDI instrument. They hear the captured sound instead of a fresh rendering through whatever piano patch their software happens to load. Your choice of sound remains part of the recording.
MIDI still has value alongside it. If you send both, label the audio as the listening reference and the MIDI as the editable performance data, so their purposes stay clear.
A USB flash drive introduces a separate distinction. Roland lists WAV and MP3 under audio playback, while the onboard recorder is specified as Standard MIDI File recording. Supported playback formats do not establish that the piano records directly into those formats.
If you need a WAV file, capture audio in recording software and export that recording as WAV. Don’t rename a MIDI file’s extension and expect the sound to appear. Rendering MIDI to audio requires an instrument to produce it.
Before recording the full piece, capture a few loud chords and a quiet passage. Listen to the saved test, checking for distortion, missing sound, or a level so low that the softer notes are hard to judge.
Use the recording software’s input meter to check the loudest passage before committing to a take. Leave room below clipping, and repeat the short test after adjusting levels. Hearing comfortable volume from the piano alone doesn’t tell you what the recording software has captured.
A lesson video needs usable sound and a useful view
The FP-40 supports a headset microphone for recording piano and voice with a connected mobile device. Its setup guidance includes microphone level and effects adjustments, followed by audio-and-video capture in a camera app.For a lesson submission, frame the keyboard and your hands before worrying about the room behind you. If the teacher needs to assess pedal movement, include that in the view or make a separate clearly labeled clip. An attractive shot of your face won’t show the fingering they need to examine.
Test speech and piano together before the full performance. Say the piece’s name, play its loudest section, and listen to the saved clip to check whether both remain clear.
After the final chord, leave the recording running until the sound has faded. When trimming, keep that decay intact and retain any opening count-in the teacher needs to judge your entrance. Cutting tightly against the first and last notes can remove part of the performance you meant to share.