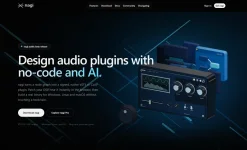
Nagi can build native VST3 and CLAP plugins from one visual project on Windows, macOS, and Linux without requiring you to write C++. The cleanest first project is a small effect with an obvious input and output, not a monster synth with twenty controls and three modulation systems.
Start with audio coming in, add one or two processing blocks, connect the output, and listen inside Nagi before touching the interface. Keep the first version almost boring. A simple filter, compressor, chorus, or delay gives you fewer places to look when something sounds wrong.
Audio, MIDI, and parameter ports live on the same graph, while the patch itself is saved as JSON. Save a clean working version before adding extra branches, modulation, or interface work, since ordinary project files make version tracking practical. A small checkpoint also makes it easier to tell whether a later problem came from DSP, layout, or build settings.
The node library covers common jobs such as oscillators, filters, dynamics, reverb, chorus, flanging, de-essing, formant filtering, and stereo imaging. Once the stock blocks stop being enough, Nagi can hand the deeper DSP work to Faust through main.dsp. Faust's compiled DSP model turns signal-processing descriptions into efficient deployable code, making the move into Faust real custom DSP rather than cosmetic scripting.
You do not need to make that jump on day one. For a first Nagi plugin without C++, staying on the graph long enough to understand the signal path is usually the cleaner move.
Next, decide which parameters a user actually needs. A delay might expose time, feedback, mix, and perhaps tone while leaving internal housekeeping alone. Nagi's interface designer binds controls to real parameters and supports per-widget ranges and response curves, so each knob can behave as the DSP expects.
Meters, sliders, keyboards, envelope displays, spectrum displays, preset browsers, filmstrip animations, and image skins are available when the plugin needs them. Restraint helps here. A four-control effect with readable ranges is easier to test than a dashboard full of knobs whose purpose you have already forgotten.
Do one ugly but useful pass before styling anything. Push each control to its minimum and maximum, listening for silence, runaway level, zippering, or ranges that make half the knob useless. Fix those problems in the patch before polishing the panel.
The Nagi plugin builder workflow also keeps the project on your own disk and allows builds without an account. Save another known-good version once the DSP and interface agree, then move to the actual plugin build.
If your DAW supports both formats, test both instead of assuming they behave identically. Hosts talk to VST3 and CLAP through different plugin interfaces, so a clean VST3 scan does not prove the CLAP build is equally healthy.
Load the result in the DAW you genuinely use. Move every exposed control, automate a few parameters, save the session, close it, reopen it, and make sure the settings come back. Try more than one buffer size if possible, since host-specific problems can appear after a patch leaves Nagi's preview and enters a real session.
Formal validation is worth doing before you share the build. Steinberg provides a VST3 validator for checking format conformity, while the CLAP project maintains clap-validator for automated behavior checks. The CLAP tool can exercise parameter changes, state handling, audio and note events, and crash-prone behavior that casual listening may never trigger.
For your first build, the practical finish line is simple. The plugin loads, sounds the same after export, remembers its state, responds properly to automation, and survives normal session use. Once those basics are solid, adding more nodes stops being guesswork and starts being actual plugin design.
Start with audio coming in, add one or two processing blocks, connect the output, and listen inside Nagi before touching the interface. Keep the first version almost boring. A simple filter, compressor, chorus, or delay gives you fewer places to look when something sounds wrong.
Nagi removes C++ but not signal flow
No-code does mean no decisions. You still need to know what enters the plugin, what changes the signal, which parameters should be exposed, and what leaves the output. Nagi just moves those decisions onto a node canvas instead of making you build the same structure through framework code.Audio, MIDI, and parameter ports live on the same graph, while the patch itself is saved as JSON. Save a clean working version before adding extra branches, modulation, or interface work, since ordinary project files make version tracking practical. A small checkpoint also makes it easier to tell whether a later problem came from DSP, layout, or build settings.
The node library covers common jobs such as oscillators, filters, dynamics, reverb, chorus, flanging, de-essing, formant filtering, and stereo imaging. Once the stock blocks stop being enough, Nagi can hand the deeper DSP work to Faust through main.dsp. Faust's compiled DSP model turns signal-processing descriptions into efficient deployable code, making the move into Faust real custom DSP rather than cosmetic scripting.
You do not need to make that jump on day one. For a first Nagi plugin without C++, staying on the graph long enough to understand the signal path is usually the cleaner move.
Build the sound before touching the interface
Get the audio behavior stable first. Use Nagi's instant preview to change the patch, listen, move a parameter, and listen again without compiling a fresh plugin after every edit. Short feedback loops matter because you can catch a bad gain stage or ridiculous filter range before you spend time arranging knobs around it.Next, decide which parameters a user actually needs. A delay might expose time, feedback, mix, and perhaps tone while leaving internal housekeeping alone. Nagi's interface designer binds controls to real parameters and supports per-widget ranges and response curves, so each knob can behave as the DSP expects.
Meters, sliders, keyboards, envelope displays, spectrum displays, preset browsers, filmstrip animations, and image skins are available when the plugin needs them. Restraint helps here. A four-control effect with readable ranges is easier to test than a dashboard full of knobs whose purpose you have already forgotten.
Do one ugly but useful pass before styling anything. Push each control to its minimum and maximum, listening for silence, runaway level, zippering, or ranges that make half the knob useless. Fix those problems in the patch before polishing the panel.
The Nagi plugin builder workflow also keeps the project on your own disk and allows builds without an account. Save another known-good version once the DSP and interface agree, then move to the actual plugin build.
The exported file still needs host testing
Nagi can build VST3 and CLAP from the same project, either locally or through an isolated container. A successful build is only the first gate. A host still has to scan the file, instantiate it, process audio, expose its parameters, and restore saved state correctly.If your DAW supports both formats, test both instead of assuming they behave identically. Hosts talk to VST3 and CLAP through different plugin interfaces, so a clean VST3 scan does not prove the CLAP build is equally healthy.
Load the result in the DAW you genuinely use. Move every exposed control, automate a few parameters, save the session, close it, reopen it, and make sure the settings come back. Try more than one buffer size if possible, since host-specific problems can appear after a patch leaves Nagi's preview and enters a real session.
Formal validation is worth doing before you share the build. Steinberg provides a VST3 validator for checking format conformity, while the CLAP project maintains clap-validator for automated behavior checks. The CLAP tool can exercise parameter changes, state handling, audio and note events, and crash-prone behavior that casual listening may never trigger.
For your first build, the practical finish line is simple. The plugin loads, sounds the same after export, remembers its state, responds properly to automation, and survives normal session use. Once those basics are solid, adding more nodes stops being guesswork and starts being actual plugin design.